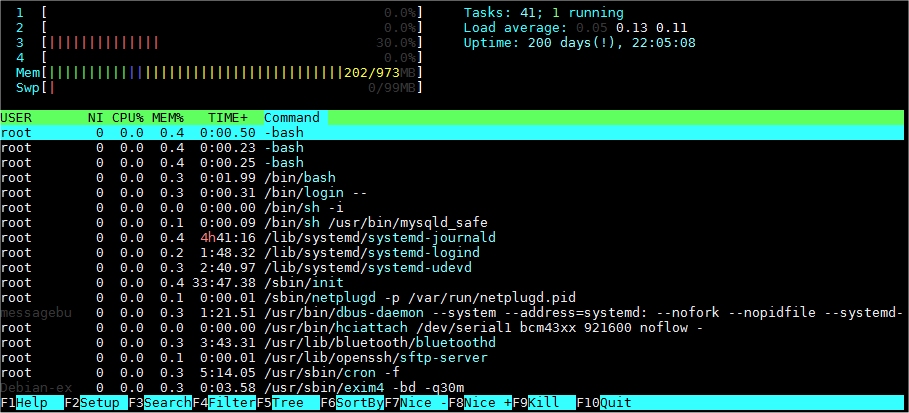
Some time ago I setup a webserver on a self hosted raspberry pi to host two small static sites. Today it has reached 200 days uptime! this is better than most VPS providers i’ve used.

Some time ago I setup a webserver on a self hosted raspberry pi to host two small static sites. Today it has reached 200 days uptime! this is better than most VPS providers i’ve used.
Now i’ve clearly missed the boat on bitcoin mining and it seems that unless you have a datacentre crammed full of racks with hardware you can’t make any decent return on it. An ex colleague of mine did ‘well’l on it at one point but not sure if he’s still running it these days. That said it’s something i’ve always been interested in and with a pi sitting idle I thought I would give it a go.
Hardware
Raspberry Pi Model B + Case + PSU
Transcend 4GB Class 10 SD Card
7 Port Powered USB Hub (I had a spare anker usb 3.0 one)
SD card reader/writer
Arctic usb powered fan (the asics run hot!) £5.99 at the time of this article
Software
How To
Download and install Win32 disk imager
Download the Minepeon pi image file from their site i’ve also hosted it here MinePeon-0.2.4.6-RaspberryPi.img.zip sha256sum 3b85225252795e53e22f23b07bf54a3423db73112e78f022023b55ec825fe82c as per https://downloads.mineforeman.com/minepeon/sha256sum.txt
Extract the image file
Insert SD card into your reader
Run Win32 disk imager
Select your sd card device on the right i.e [H\] WARNING make sure you choose the correct drive letter or you may end up erasing the wrong drive!
Click the folder icon and browse to the image file you extracted earlier.
Check the destination drive letter is right!
Check the destination drive letter is right!
Click ‘Write’
Once the image has been written stick it in your pi
Connect pi to a monitor and ethernet port on your router
Switch on the pi, the boot screen will load and it will try and obtain an ip via dhcp, it boots really quickly so i missed the ip it got so I did an nmap to find it.
Put the ip into your browser and you will probably get a security warning (just accept it).
Login with
Username: minepeon
Password: peon
You should be greeted with the main dashboard.

The settings menu allows you to change your password, restart miner ever x hours, define SHA cores on dual mode and specify update url.
The help menu unfortunately only displays “Work in progress”
Update allows you to update Hashra, when I clicked on it it stated “A newer version is available, do you want to Update?” but I have decided not to do this for now.
Back on the dashboard I ntoced that it said “Running in SCRYPT mode” obviously if your only wanting to mine Litecoin for example you can leave it set to this. Below are some mining stats/hash rate etc.
The final selectable options are Scrypt SHA256 and Dual which you’ll need to set depending on what you want to mine, after choosing you will need to ‘Save and restart’.
While researching bitcoin mining hardware and was considering purchasing the Antminer U3 as I liked it’s apparent ease of setup and higher hash rate then a usb asic I stumbled upon the Gridseed 5 Chip Dual ASIC Miner GC3355. The Gridssed had similar form factor but the added bonus that it is a dual miner and can do either SHA-256 (Bitcoin) OR Scrypt (i.e litecoin) and even both simultaneously.
Specifications
| Mode | SHA256 (Bitcoin) | Scrypt (Litecoin/Dogecoin) | Power Consumtion (watts) |
|---|---|---|---|
| Dual Mode | 8 gh/s | 300 kh/s | 60 watts |
| Scrypt Only Mode | OFF | 330 kh/s | 7 watts |
Software
As it was always the intention to use my spare Pi B as the controller I spent some time looking for suitable compatible software. One thing I wanted specifically was a web based control panel so I could setup monitoring on a seperate screen and for the ease of learning what all the differnet numbers mean.
I cam across this useful blog post on cryptomining-blog I narrowed my choice down to Scripta and Hashra. On the post they gave the highest props to Scripta however a downside is that it supports SHA-256 (Botcoin) mining only. While this is new to me I didn’t want to limit myself to just Bitcoin so the obvious choice was Hashra as it supports scrypt only (bfgminer), SHA-256 (cgminer) only or dual-mining mode (cpuminer + cgminer).
After managing to win one on ebay I obviously decided to drop my previous BTC/Minepoen project.
How To
Download and install Win32 disk imager
Hashra, they have different images on their site to use depending on your hardware choice. As I will be using the Gridseed 5 Mini I downloaded the following image HASHRA MINI CONTROLA FIRMWARE DOWNLOAD I have also hosted it on theoutpost as an alternative location. sha256sum 7FC32B10DD6CC9B1046954159E9808DB356112A7D686C9597178873F546D1A0E
Extract the image file
Insert SD card into your reader
Run Win32 disk imager
Select your sd card device on the right i.e [H\] WARNING make sure you choose the correct drive letter or you may end up erasing the wrong drive!
Click the folder icon and browse to the image file you extracted earlier.
Check the destination drive letter is right!
Check the destination drive letter is right!
Click ‘Write’
Once the image has been written stick it in your pi
Connect pi to a monitor and ethernet port on your router
Switch on the pi, the boot screen will load and it will try and obtain an ip via dhcp, once it’s finished booting just before the login prompt it should display it’s ip address.
Put the ip into your browser i.e http://192.168.1.211/ and you should get the login page

Login with
Username: hashra
Password: hashra
You should then see the main dashboard.
The settings menu allows you to change your password, restart miner ever x hours, define SHA cores on dual mode and specify update url.
The help menu unfortunately only displays “Work in progress”
Update allows you to update Hashra, when I clicked on it it stated “A newer version is available, do you want to Update?” but I have decided not to do this for now.
Back on the dashboard I ntoced that it said “Running in SCRYPT mode” obviously if your only wanting to mine Litecoin for example you can leave it set to this. Below are some mining stats/hash rate etc.
On the right are boxes for you to set your mining pools and adjust the clock rate of your miners.
The final selectable options are Scrypt SHA256 and Dual which you’ll need to set depending on what you want to mine, after choosing you will need to ‘Save and restart’.
After this I logged into the pi via ssh using
User: pi
Password: 3K4Hb8FMeZjQZJEX6scYzZa
I was happy to find that it was running Raspbian GNU/Linux 7 \n \l with apt-get etc installed as well as sudo.
As I’m due to tow horses for this years show season I thought it would be a good idea to have a camera in the trailer and monitor in the car so I can see how the horse is doing. I looked at off the shelf systems but they were all £100 plus and a lot weren’t wireless and required a constant power supply for the camera in the trailer. So it got me thinking that maybe I could knock something utilising my used pi zero’s. Project brief My idea is to use a pi zero enclosed in a monitor case and connected to it via it’s ‘TV’ pads and all powered via 5v. The camera end will again be a pi zero in some sort of enclosure running off a usb battery bank.
I use my Pi B in my car to do timelapse photos powered off a cigarette to usb plug however I found that sometimes the plug would fall out and thus power down the pi. I also had the problem that even if I wanted to stop for 5 minutes which meant turning the engine off again the pi would be powered down. TO overcome this I thought I would look into using a usb power bank as a mini ups and here are the results of my testing.
I tested for both pass-through charging i.e. a power bank which allows to be charged while powering a device AND ‘UPS’ which is a usb bank which supports pass-through charging with the added feature of power to the connected device (pi) being uninteruppted when the mains charger was switched off/on.
I was looking for a 5v monitor for my Pi for use in the car but the ones are found seemed to be very expensive, undeterred I set about buying a 12v and adapting it to my needs.
I found one on Amazon for £12.46 which seemed to fit the bill perfectly. Described as
BW® 4.3” Color TFT Car Monitor Support 480 x 272 Resolution + Car Rear-view Mirror System Monitor, Mini Monitor for Car / Automobile
Digital color TFT LCD car rearview monitor,4.3 inch TFT LCD Screen Size, 480 x 272 Resolution,16 : 9 Display Format
It is with high quality and good durability,With small appearance,convenient for carry,Support 2-channel video input(V1, V2).
It Support multi-role display,With high definition for good image,With a stand holder which has adhesive sticker in the bottom for sticking it in the car.
It Support automatically startup detection when reserving,It can connect with reversing camera, DVD, VCD etc.
It is installed in the drive foreground,Video system: NTSC / PAL auto switchable,Display black screen on no signal,Visible area: 72 x 53 mm.
Ok so at 480 x 272 not mega resolution but perfectly useable to my console command line based application.


Contents of the box was the monitor with hard wired phono audio and video cables and a socket based power connector with inline fuse. Also was a sperate jack plug with bare red and black wires for connecting to your power source.

I thought I would power it up just to make sure it worked before taking it apart, plugged into my home made bench psu and nothing?

I put my multimeter on it to make sure the psu was working properly and it was?

I then plugged in my Pi and the screen sprung into life.

It seems a 1p bulb is too much to ask for on a £12 monitor.
**** WARNING MAKING THE FOLLOWING CHANGES WILL OBVIOUSLY INVALIDATE ANY WARRANTY ETC, CONTINUE AT YOUR OWN RISK, I ACCEPT NO RESPONSIBILITY IF ANY OF YOUR EQUIPMENT BREAKS/CATCHES FIRE ETC ****
Removing the four small screws on the rear and opening the case revealed a simple circuit board.


After some digging around with the multimeter I found a 5v supply on the CHMC 8AY 1508-AD chip.

I removed the red feed wire from it’s currently location onto the 5v leg of the chip and added some electrical tape for strain relief.


Now time for the test (fingers crossed)

Great it powered up fine.
Wanting to run off a usb cigarette adapter in the car I added a USB connector to the bare red/black wires of the jack plug,


The finished article.


This tip is useful if you have scripts running that copy files to specific locations and you want the mounts to remain static. Although this is aimed at the raspberry pi it will also work on Debian etc you’ll just need to change the UID, GID etc.
I use ntfs drives so I can use them both on linux and windows so the first step was to install ntfs-3g
sudo apt-get install ntfs-3g
Insert the usb drive into a free port and run the following command to find out it’s UUID
ls -l /dev/disk/by-uuid/
My test drive showed this
lrwxrwxrwx 1 root root 10 Nov 16 20:52 DE64414D64412A1B -> ../../sda1
Make a note of the UUID – DE64414D64412A1B and the drive location /sda1
Create a mount point ie
sudo mkdir /man/usbflash
Set permissions
sudo chmod 770 /mnt/usbflash
Obtain the userid (UID) and groupid (GID) of the pi user
id
mine returned
uid=1000(pi) gid=1000(pi)
Mount the flash drive (note i’m using ntfs-3g for ntfs. Use vfat for FAT32 and ext4 for ext4)
sudo mount -t ntfs-3g -o uid=1000,gid=1000,umask=007 /dev/sda1 /mnt/usbflash
To make this persistant we update fstab but before doing so it’s a good idea to make a backup
sudo cp /etc/fstab /etc/fstab.backup
sudo nano /etc/fstab
Add the following to fstab (replace UUID UID GID and mount point with yours)
UUID=DE64414D64412A1B /mnt/usbflash ntfs-3g uid=1000,gid=1000,umask=007 0 0
Before mine looked like this
proc /proc proc defaults 0 0
/dev/mmcblk0p1 /boot vfat defaults 0 2
/dev/mmcblk0p2 / ext4 defaults,noatime 0 1
# a swapfile is not a swap partition, so no using swapon|off from here on, use dphys-swapfile swap[on|off] for that
and after
proc /proc proc defaults 0 0
/dev/mmcblk0p1 /boot vfat defaults 0 2
/dev/mmcblk0p2 / ext4 defaults,noatime 0 1
UUID=DE64414D64412A1B /mnt/usbflash ntfs-3g uid=1000,gid=1000,umask=007 0 0
# a swapfile is not a swap partition, so no using swapon|off from here on, use dphys-swapfile swap[on|off] for that
Reboot
sudo reboot
That’s it you should find you drive automatically mounted under the folder you specified ie /mnt/usbflash
I’ve now completed my wordpress server install script, all details are available via the scripts page http://www.theoutpost.org/scripts/pipress/
This quick guide will walk you through installing the lighttpd webserver on a raspberry Pi.
Update packages
sudo apt-get update
Install lighttpd
sudo apt-get install lighttpd
Once completed enter your pi’s ip address in a browser and if all has gone well your should see the holding page.

Now we will adjust some permissions to ensure the “Pi” user account can write files to the location where Lighttpd expects to find web pages. The /var/www directory is currently owned by the “root” user. So let’s make the “www-data” user and group the owner of the /var/www directory.
sudo chown -R www-data:www-data /var/www
Allow the “www-data” group permission to write to /var/www
sudo chmod 775 /var/www
Add the “Pi” user to the “www-data” group.
sudo usermod -a -G www-data pi
For permissions to take effect reboot te Pi
sudo reboot
I had the need to upload files to the cloud to share with family members and rather than using web servers/ftp I thought i’d try something different and try uploading to my google drive, after a quick search I found the grive application and this is my howto for intsatalling it. This application syncs data between your pi and google drive so when exectued any newly created directories and files on either will be refelcted on the other.
Debian GNU/Linux 7.0 \n \l
Linux devpi 3.6.11+ #456 PREEMPT Mon May 20 17:42:15 BST 2013 armv6l GNU/Linux
sudo apt-get install git cmake build-essential libgcrypt11-dev libjson0-dev libcurl4-openssl-dev libexpat1-dev libboost-filesystem-dev libboost-program-options-dev binutils-dev libboost-test-dev libqt4-dev libyajl-dev
cd /usr/bin (or location of your choice)
git clone git://github.com/Grive/grive.git
Now the next bit i’m unsure if it is required but I saw a couple of places and mention it and it worked for me.
nano /usr/bin/grive/libgrive/src/drive/State.cc
Lines that use the Add() method need to contain a cast to the correct size of integer. The expression “(boost::uint64_t)” must be added to lines 251, 252 and 256.
Original code
[code]void State::Write( const fs::path& filename ) const
{
Json last_sync ;
last_sync.Add( “sec”, Json(m_last_sync.Sec() ) );
last_sync.Add( “nsec”, Json(m_last_sync.NanoSec() ) );
Json result ;
result.Add( “last_sync”, last_sync ) ;
result.Add( “change_stamp”, Json(m_cstamp) ) ;
std::ofstream fs( filename.string().c_str() ) ;
fs << result ;
}[/code]
Edited code
[code]void State::Write( const fs::path& filename ) const
{
Json last_sync ;
last_sync.Add( “sec”, Json((boost::uint64_t)m_last_sync.Sec() ) );
last_sync.Add( “nsec”, Json((boost::uint64_t)m_last_sync.NanoSec() ) );
Json result ;
result.Add( “last_sync”, last_sync ) ;
result.Add( “change_stamp”, Json((boost::uint64_t)m_last_sync.NanoSec() ) );
std::ofstream fs( filename.string().c_str() ) ;
fs << result ;
}[/code]
cd grive
cmake .
make
Go off and make a cup of tea, this was the output from my ‘make’
— The C compiler identification is GNU 4.6.3
— The CXX compiler identification is GNU 4.6.3
— Check for working C compiler: /usr/bin/gcc
— Check for working C compiler: /usr/bin/gcc — works
— Detecting C compiler ABI info
— Detecting C compiler ABI info – done
— Check for working CXX compiler: /usr/bin/c++
— Check for working CXX compiler: /usr/bin/c++ — works
— Detecting CXX compiler ABI info
— Detecting CXX compiler ABI info – done
— Found libgcrypt: -L/lib/arm-linux-gnueabihf -lgcrypt
— Found JSON-C: /usr/lib/arm-linux-gnueabihf/libjson.so
— Found CURL: /usr/lib/arm-linux-gnueabihf/libcurl.so (found version “7.26.0”)
— Found EXPAT: /usr/lib/arm-linux-gnueabihf/libexpat.so (found version “2.1.0”)
— Boost version: 1.49.0
— Found the following Boost libraries:
— program_options
— filesystem
— unit_test_framework
— system
— Found libbfd: /usr/lib/libbfd.so
— Found ZLIB: /usr/lib/arm-linux-gnueabihf/libz.so (found version “1.2.7”)
— Boost version: 1.49.0
— Found the following Boost libraries:
— program_options
— Looking for Q_WS_X11
— Looking for Q_WS_X11 – found
— Looking for Q_WS_WIN
— Looking for Q_WS_WIN – not found.
— Looking for Q_WS_QWS
— Looking for Q_WS_QWS – not found.
— Looking for Q_WS_MAC
— Looking for Q_WS_MAC – not found.
— Found Qt4: /usr/bin/qmake (found version “4.8.2”)
— Boost version: 1.49.0
— Configuring done
— Generating done
— Build files have been written to: /usr/bin/grive
root@devpi:/usr/bin/grive# make
Scanning dependencies of target grive
[ 1%] Building CXX object libgrive/CMakeFiles/grive.dir/src/drive/Drive.cc.o
/tmp/ccUoIJGZ.s: Assembler messages:
/tmp/ccUoIJGZ.s:1217: Warning: swp{b} use is deprecated for ARMv6 and ARMv7
[ 3%] Building CXX object libgrive/CMakeFiles/grive.dir/src/drive/ResourceTree.cc.o
[ 5%] Building CXX object libgrive/CMakeFiles/grive.dir/src/drive/State.cc.o
/tmp/ccqpHvLk.s: Assembler messages:
/tmp/ccqpHvLk.s:1304: Warning: swp{b} use is deprecated for ARMv6 and ARMv7
[ 7%] Building CXX object libgrive/CMakeFiles/grive.dir/src/drive/Resource.cc.o
/tmp/ccsa5Cwk.s: Assembler messages:
/tmp/ccsa5Cwk.s:1784: Warning: swp{b} use is deprecated for ARMv6 and ARMv7
[ 8%] Building CXX object libgrive/CMakeFiles/grive.dir/src/drive/Entry.cc.o
[ 10%] Building CXX object libgrive/CMakeFiles/grive.dir/src/drive/CommonUri.cc.o
/tmp/ccoSoHiI.s: Assembler messages:
/tmp/ccoSoHiI.s:2087: Warning: swp{b} use is deprecated for ARMv6 and ARMv7
[ 12%] Building CXX object libgrive/CMakeFiles/grive.dir/src/drive/Feed.cc.o
/tmp/ccxSRdbr.s: Assembler messages:
/tmp/ccxSRdbr.s:2043: Warning: swp{b} use is deprecated for ARMv6 and ARMv7
[ 14%] Building CXX object libgrive/CMakeFiles/grive.dir/src/drive2/Drive.cc.o
[ 16%] Building CXX object libgrive/CMakeFiles/grive.dir/src/drive2/Resource.cc.o
[ 17%] Building CXX object libgrive/CMakeFiles/grive.dir/src/drive2/Feed.cc.o
/tmp/ccRyox4j.s: Assembler messages:
/tmp/ccRyox4j.s:807: Warning: swp{b} use is deprecated for ARMv6 and ARMv7
[ 19%] Building CXX object libgrive/CMakeFiles/grive.dir/src/http/Download.cc.o
[ 21%] Building CXX object libgrive/CMakeFiles/grive.dir/src/http/CurlAgent.cc.o
/tmp/cc46d8yU.s: Assembler messages:
/tmp/cc46d8yU.s:2734: Warning: swp{b} use is deprecated for ARMv6 and ARMv7
[ 23%] Building CXX object libgrive/CMakeFiles/grive.dir/src/http/StringResponse.cc.o
[ 25%] Building CXX object libgrive/CMakeFiles/grive.dir/src/http/XmlResponse.cc.o
[ 26%] Building CXX object libgrive/CMakeFiles/grive.dir/src/http/ResponseLog.cc.o
/tmp/ccadIJw8.s: Assembler messages:
/tmp/ccadIJw8.s:2136: Warning: swp{b} use is deprecated for ARMv6 and ARMv7
[ 28%] Building CXX object libgrive/CMakeFiles/grive.dir/src/http/Header.cc.o
[ 30%] Building CXX object libgrive/CMakeFiles/grive.dir/src/protocol/AuthAgent.cc.o
/tmp/ccinj0Nr.s: Assembler messages:
/tmp/ccinj0Nr.s:2734: Warning: swp{b} use is deprecated for ARMv6 and ARMv7
[ 32%] Building CXX object libgrive/CMakeFiles/grive.dir/src/protocol/OAuth2.cc.o
[ 33%] Building CXX object libgrive/CMakeFiles/grive.dir/src/protocol/JsonResponse.cc.o
[ 35%] Building CXX object libgrive/CMakeFiles/grive.dir/src/protocol/Json.cc.o
/tmp/ccQSz3wF.s: Assembler messages:
/tmp/ccQSz3wF.s:1284: Warning: swp{b} use is deprecated for ARMv6 and ARMv7
[ 37%] Building CXX object libgrive/CMakeFiles/grive.dir/src/json/JsonParser.cc.o
/tmp/ccPFN5lG.s: Assembler messages:
/tmp/ccPFN5lG.s:1258: Warning: swp{b} use is deprecated for ARMv6 and ARMv7
[ 39%] Building CXX object libgrive/CMakeFiles/grive.dir/src/json/Val.cc.o
/tmp/ccpF11ho.s: Assembler messages:
/tmp/ccpF11ho.s:1258: Warning: swp{b} use is deprecated for ARMv6 and ARMv7
[ 41%] Building CXX object libgrive/CMakeFiles/grive.dir/src/json/JsonWriter.cc.o
[ 42%] Building CXX object libgrive/CMakeFiles/grive.dir/src/json/ValBuilder.cc.o
/tmp/ccLZ9For.s: Assembler messages:
/tmp/ccLZ9For.s:1317: Warning: swp{b} use is deprecated for ARMv6 and ARMv7
[ 44%] Building CXX object libgrive/CMakeFiles/grive.dir/src/json/ValResponse.cc.o
[ 46%] Building CXX object libgrive/CMakeFiles/grive.dir/src/util/Config.cc.o
[ 48%] Building CXX object libgrive/CMakeFiles/grive.dir/src/util/MemMap.cc.o
[ 50%] Building CXX object libgrive/CMakeFiles/grive.dir/src/util/Crypt.cc.o
/tmp/ccO8XZsF.s: Assembler messages:
/tmp/ccO8XZsF.s:1258: Warning: swp{b} use is deprecated for ARMv6 and ARMv7
[ 51%] Building CXX object libgrive/CMakeFiles/grive.dir/src/util/SignalHandler.cc.o
[ 53%] Building CXX object libgrive/CMakeFiles/grive.dir/src/util/Exception.cc.o
/tmp/ccW3Aswb.s: Assembler messages:
/tmp/ccW3Aswb.s:1298: Warning: swp{b} use is deprecated for ARMv6 and ARMv7
[ 55%] Building CXX object libgrive/CMakeFiles/grive.dir/src/util/StringStream.cc.o
[ 57%] Building CXX object libgrive/CMakeFiles/grive.dir/src/util/File.cc.o
/tmp/ccfUIifg.s: Assembler messages:
/tmp/ccfUIifg.s:1317: Warning: swp{b} use is deprecated for ARMv6 and ARMv7
[ 58%] Building CXX object libgrive/CMakeFiles/grive.dir/src/util/DateTime.cc.o
/tmp/ccdVVlEY.s: Assembler messages:
/tmp/ccdVVlEY.s:1258: Warning: swp{b} use is deprecated for ARMv6 and ARMv7
[ 60%] Building CXX object libgrive/CMakeFiles/grive.dir/src/util/OS.cc.o
/tmp/ccZ13815.s: Assembler messages:
/tmp/ccZ13815.s:1258: Warning: swp{b} use is deprecated for ARMv6 and ARMv7
[ 62%] Building CXX object libgrive/CMakeFiles/grive.dir/src/util/StdStream.cc.o
[ 64%] Building CXX object libgrive/CMakeFiles/grive.dir/src/util/log/Log.cc.o
[ 66%] Building CXX object libgrive/CMakeFiles/grive.dir/src/util/log/DefaultLog.cc.o
[ 67%] Building CXX object libgrive/CMakeFiles/grive.dir/src/util/log/CompositeLog.cc.o
[ 69%] Building CXX object libgrive/CMakeFiles/grive.dir/src/util/log/CommonLog.cc.o
[ 71%] Building CXX object libgrive/CMakeFiles/grive.dir/src/xml/String.cc.o
[ 73%] Building CXX object libgrive/CMakeFiles/grive.dir/src/xml/TreeBuilder.cc.o
/tmp/ccw5H8GH.s: Assembler messages:
/tmp/ccw5H8GH.s:1258: Warning: swp{b} use is deprecated for ARMv6 and ARMv7
[ 75%] Building CXX object libgrive/CMakeFiles/grive.dir/src/xml/NodeSet.cc.o
/tmp/ccChV8aK.s: Assembler messages:
/tmp/ccChV8aK.s:1284: Warning: swp{b} use is deprecated for ARMv6 and ARMv7
[ 76%] Building CXX object libgrive/CMakeFiles/grive.dir/src/xml/Node.cc.o
/tmp/cce88Vcr.s: Assembler messages:
/tmp/cce88Vcr.s:1284: Warning: swp{b} use is deprecated for ARMv6 and ARMv7
[ 78%] Building CXX object libgrive/CMakeFiles/grive.dir/src/bfd/Backtrace.cc.o
[ 80%] Building CXX object libgrive/CMakeFiles/grive.dir/src/bfd/Debug.cc.o
[ 82%] Building CXX object libgrive/CMakeFiles/grive.dir/src/bfd/SymbolInfo.cc.o
Linking CXX static library libgrive.a
[ 82%] Built target grive
Scanning dependencies of target btest
[ 83%] Building CXX object libgrive/CMakeFiles/btest.dir/test/btest/UnitTest.cc.o
[ 85%] Building CXX object libgrive/CMakeFiles/btest.dir/test/btest/JsonValTest.cc.o
/tmp/ccmfDU7O.s: Assembler messages:
/tmp/ccmfDU7O.s:1331: Warning: swp{b} use is deprecated for ARMv6 and ARMv7
[ 87%] Building CXX object libgrive/CMakeFiles/btest.dir/test/btest/ValTest.cc.o
/tmp/ccykX0B1.s: Assembler messages:
/tmp/ccykX0B1.s:1331: Warning: swp{b} use is deprecated for ARMv6 and ARMv7
Linking CXX executable btest
[ 87%] Built target btest
Scanning dependencies of target grive_executable
[ 89%] Building CXX object grive/CMakeFiles/grive_executable.dir/src/main.cc.o
/tmp/ccCqNHWz.s: Assembler messages:
/tmp/ccCqNHWz.s:1788: Warning: swp{b} use is deprecated for ARMv6 and ARMv7
Linking CXX executable grive
[ 89%] Built target grive_executable
[ 91%] Generating src/moc_MainWnd.cxx
[ 92%] Generating ui_MainWindow.h
Scanning dependencies of target bgrive_executable
[ 94%] Building CXX object bgrive/CMakeFiles/bgrive_executable.dir/src/main.cc.o
[ 96%] Building CXX object bgrive/CMakeFiles/bgrive_executable.dir/src/MainWnd.cc.o
[ 98%] Building CXX object bgrive/CMakeFiles/bgrive_executable.dir/src/DriveModel.cc.o
/tmp/cc6HZ70x.s: Assembler messages:
/tmp/cc6HZ70x.s:1731: Warning: swp{b} use is deprecated for ARMv6 and ARMv7
[100%] Building CXX object bgrive/CMakeFiles/bgrive_executable.dir/src/moc_MainWnd.cxx.o
Linking CXX executable bgrive
[100%] Built target bgrive_executable
Next create a directory where you want to keep your google drive files ie /home/user/googledrive and copy the grive executable to it.
root@devpi:/usr/bin/grive/ cp grive /home/user/googledrive
NOTE: RUNNING THIS APPLICATION WILL SYNC DATA BETWEEN GOOGLE DRIVE AND YOUR PI, CHECK YOUR USAGE ON GOOGLE DRIVE TO ENSURE YOU HAVE ENOUGH STORAGE ON YOUR PI
The first time your run grive you need to do it with the -a option
cd /home/user/googledrive
./grive -a
A link will be printed in the terminal window. Copy the link and paste it in a browser. A page on google will appear asking you confirm permissions for the app.

After clicking accept you will be taken to another google page which has a bog with a code in it

copy and paste this into your terminal
Please input the authentication code here:
xxxxxxxxxxxxxxxxxxxxxxxxxxxxxxxxxxxxxxx
That’s it your first sync is done, your googledrive directory on your pi should now reflect whats stored on your remote google drive. Adding files to either the pi or cloud will be reflected the next time grive is exectuted using the command grive from your created folder ie
cd /home/user/googledrive
grive
Now you can create scripts/cron jobs to automatically sync your files.
ENJOY!