ZyXel VMG8924-B10A Supervisor Password

The device has a hidden supervisor (super admin) account available on it that will give you access to extra features not normally available via the normal “admin” login.

This was carried out on a vanilla device i.e not supplied by an isp with their specific firmware loaded so YMMV.

Obtaining the supervisor password
Firstly not all firmware versions allow the extraction of the password but after some searching I managed to obtain one. VMG8924-B10A_1.00_AAKL.16_C0

This tutorial assumes you are proficient with flashing the device via the gui and understand telnet/ssh etc.

Download firmware VMG8924-B10A_1.00_AAKL.16_C0.zip and extract files to a folder
Open gui to http://192.168.1.1
Log in using admin/1234 (or whatever password you have previously set)
Click Maintenance > Firmware Upgrade
Click Choose File and select the bin file from the zip you previously downloaded
Click Upload
Wait 5 minutes
Reconnect to GUI
From the Connection Status page click the right arrow labelled “Status” on the far right of the screen.
On the page that open under the device information pane the firmware version should show V1.00(AAJZ.11)C0 this verifies you have flashed the firmware successfully.
Using PUTTY or similar open a telnet session to 192.168.1.1 Login: admin Password: 1234
In putty set lines of scrollback to 9999
In the command prompt type
save_default clean
Then type
dumpmdm
This will result in many many lines of configuration text being outputted to your terminal window.
Copy and paste all of the text into a notepad document

Search the notepad document for
AdminUserName

The first line will be

<*AdminUserName>supervisor<*AdminUserName>

which is the username you will use

The line directly after it will be similar to
<*AdminPassword>z84fd3b9<*AdminPassword>

This is your Supervisor account password so copy it and keep somewhere safe.

Exit/close your terminal window.
Open a browser page to http://192.168.1.1
Login using the supervisor username and password.
Congratulations you now have access to extra features etc.
You can also login as a supervisor via telnet and will give you access to a real shell by using the sh command as opposed to the simple/strangled command one when logging in as admin.

Continue Reading

Install mysql php5 and phpmyadmin on raspberry pi

Install PHP

sudo apt-get install php5-cgi

Edit php.ini file
sudo nano /etc/php5/cgi/php.ini

Scroll the bottom and add
cgi.fix_pathinfo = 1

save and exit

Enable fast CGI
sudo lighty-enable-mod fastcgi-php

Restart lighttpd
sudo /etc/init.d/lighttpd restart

Create phpinfo page
sudo nano /var/www/phpinfo.php

and add the following
<?php phpinfo();?>

Save and exit

Enter Pi ip addres into a browser followed by phpinfo.php
http://192.168.1.x/phpinfo.php

Install MySQL and PHPMYADMIN

sudo apt-get install mysql-server mysql-client phpmyadmin

mysql root password, confirm

During the installation of PHPMyAdmin you will be asked which web server is installed. Choose lighttpd.

A message will appear asking whether you want to create a dummy database. As the message states, if you know what you are going to be using the database server for or a database is already configured then you can answer no but if you are just experimenting then you can answer yes.

I recommend answering yes to this. It doesn’t do any harm.

Continue Reading

TP-Link WDR4300 Hacking – Opening The Case

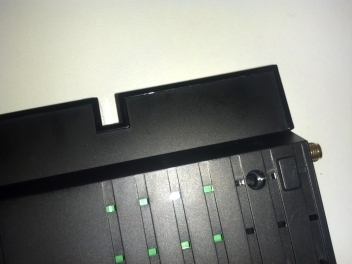
This first post on my guide to hacking the TP-Link WDR-4300 shows you how to open the case.

Start by flipping the unit over so the top is laying face down. In the four corners your will see Philips head screws, start by removing these.

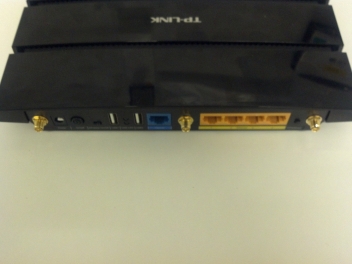
After you've done this flip the unit back over again and have the ports facing you. 

 PIC


Unscrew each antenna from it's lowest part in a clockwise motion.

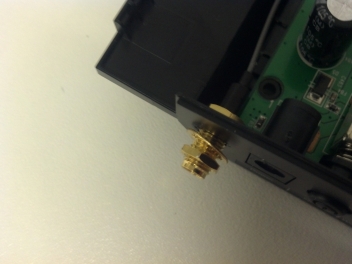
Each antenna connector is held in by an outer nut, I used a pair of long nose pliers to loosen them half a turn then the rest was easily done by hand.

NOTE: Behind the nut is also a washer which so be careful you don't lose it.

After you have removed all the nuts and washers you simply push each connector in towards the centre of the case and they pop out.

Removing the lid of the router is hard to photograph so i'll try my best to explain. Flipping it back upside down again and looking at it from the bottom you will see a darker black outline that runs all the way round, this bit is actually part of the top of the case which clicks in the the bottom half. The idea is to get something thin enough between the dark black part and the lighter part, a thin flat screwdriver head/finger nails whatever you have handy. Then it's a matter of prying the top section away, I found I had to be quote forceful to get them apart.

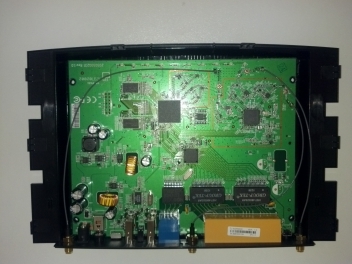
After doing that you should hopefully be left with something like this.

Continue Reading

Linksys WRT54G Hacking Part 4 – Changing The Firmware

When my linksys arrived it was already running a non stock firmware Tomato Version 1.27vpn3.6.4b664ba6 now as a previous user of dd-wrt I decided I would go back to that. First off it's a bad idea to go from one non stock f/w to another, stock to non stock gives you the best chance of an upgrade without bricking. 

So I followed this procedure

Hard Reset (aka 30/30/30 reset):

The following procedure will clear out the NVRAM and set dd-wrt back to default values:

  • With the unit powered on, press and hold the reset button on back of unit for 30 seconds
  • Without releasing the reset button, unplug the unit and hold reset for another 30 seconds
  • Plug the unit back in STILL holding the reset button a final 30 seconds

I downgraded back to stock WRT54GSv3_4.71.4.001_fw did the 30/30/30 again then upgraded to dd-wrt.v24_mini_generic however I found it didn't had support for SD cards in it which is a future mod I have planned so again I did a 30/30/30 and downgraded back to stock before reupgrading to dd-wrt.v24_std_generic

One of the first things I did was enable SSHD via the 'services' tab however when I clicked apply setting my browser was forwarded to a blank white screen @ http://192.168.1.1/applyuser.cgi I tried the same again in a different browser and it worked fine, it may have been a remnants of an old session cookie or something.


Continue Reading

Linksys WRT54G Hacking Part 2 – Adding Serial Ports

Requirements
Soldering/de soldering equipment
1x 10 way header ie from ebay or single a strip and cut your own from maplin

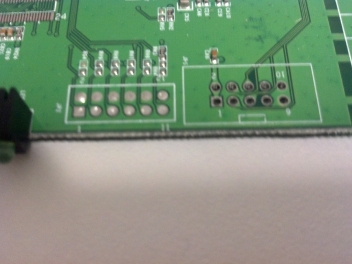
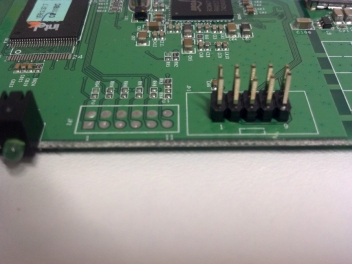
The WRT54G has two serial ports you can access via the 10 pin JP1 header which is found near the front of the router board next to the lights. I ordered some 2×5 10 way headers from ebay.

Here is a picture of where JP2 is, it's the 10 way one on the right the one on the left is a 12 way port used for JTAG which i'll cover later.

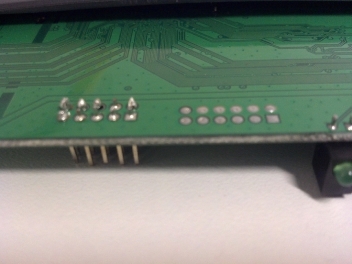
The holes in mine weren't pre soldered but i've seen others that have been so if they are you'll need to remove it first. It's then a case of inserting the header with the shortest pins exiting the bottom of the board and then soldering each one.

and how it looks from the top

Continue Reading
1 2 3 12